|
RADIATOR |
|
CLEANING
OF RADIATOR Using water or a steam
cleaner, remove any mud and dirt from the radiator core.
Notice: If using a high pressure type
cleaner, be careful not to deform the fins of the radiator core. If the cleaner nozzle
pressure is 30-35 kg/cm2 (427 - 498 psi, 2942 - 3432 kPa), keep a distance of at least
40-50 cm between the radiator core and cleaner nozzle. |
 |
INSPECTION
OF RADIATOR 1. INSPECT RADIATOR
(WATER FILLER) CAP
Using a radiator cap tester, pump the tester and measure the relief valve opening
pressure.
Standard opening pressure:
0.75 - 1.05 kg/cm2
(10.7 - 14.9 psi, 74 -103 kPa)
Minimum opening pressure:
0.6 kg/cm2 (8.5 psi, 59 kPa) |
 |
If the opening pressure is less
than minimum, replace the radiator cap. 2.
INSPECT COOLING SYSTEM FOR LEAKS
(a) Fill the radiator with coolant and attach a
radiator cap tester to the radiator (water filler) cap.
(b) Warm up the engine.
(c) Pump it to 1.2 kg/cm2 (17.1 psi, 118 kPa), check that pressure does not drop.
If the pressure drops, check for leaks on the hoses,
radiator or water pump. If no external leaks are found, check the heater core, cylinder
block and head. |
| |
REMOVAL
OF RADIATOR
|
 |
|
1. DISCONNECT CABLE
FROM NEGATIVE TERMINAL OF BATTERY CAUTION:
Work must be started after approx. 20 seconds or longer from the time the ignition
switch is turned to the "LOCK" position and the negative (-) terminal cable is
disconnected from the battery.
2. REMOVE FRONT LUGGAGE UNDER COVERS
3. DRAIN ENGINE COOLANT (See page CO-6)
|
 |
4. REMOVE UPPER
RADIATOR SUPPORT SEAL
Remove the seven clips and support seal. |
 |
5. DISCONNECT
RADIATOR HOSES |
 |
6. REMOVE FRONT
HOOD LOCK 7. DISCONNECT
RADIATOR COOLING FAN CONNECTORS
8. DISCONNECT WATER TEMPERATURE SENSOR (w
A/C) or SWITCH (w/o A/C) CONNECTOR
|
 |
9. REMOVE RADIATOR
AND COOLING FANS
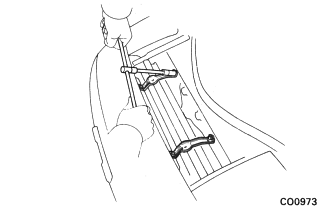
(a) Remove the two bolts and upper support. Remove the two upper supports. |
 |
(b) Remove the radiator and
two cooling fan assembly.
(c) Remove the two lower supports. |
 |
10. REMOVE NO.1 AND
NO.2 COOLING FANS FROM RADIATOR
Remove the three bolts per cooling fan. Remove the two cooling fans. |
 |
INSTALLATION
OF RADIATOR
(See page CO-17)1. INSTALL NO.1 AND NO.2 COOLING FANS TO RADIATOR
Install the cooling fan with the three bolts. Install the two cooling fans.
|
 |
2. INSTALL RADIATOR
AND COOLING FANS
(a) Place the two lower supports in position on the body. |
 |
(b) Place the radiator and
two cooling fan assembly in position on the body. |
 |
(c) Install the upper
supports with the two bolts. Install the two upper supports. |
 |
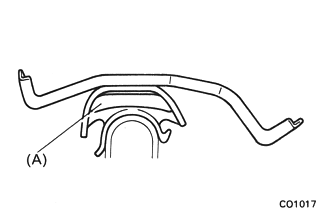
HINT: After
installation, check that the rubber cushion (A) of the supports are not depressed. 3. CONNECT WATER TEMPERATURE SENSOR (w A/C) OR SWITCH
(w/o A/C) CONNECTOR
4. CONNECT RADIATOR COOLING FAN
CONNECTORS. |
 |
5. INSTALL FRONT
HOOD LOCK |
 |
6. CONNECT RADIATOR
HOSES 7. CONNECT CABLE TO
NEGATIVE TERMINAL OF BATTERY
8. FILL WITH ENGINE COOLANT (See page CO-7)
9. START ENGINE AND CHECK FOR LEAKS |
|
10. INSTALL UPPER
RADIATOR SUPPORT SEAL
Install the support seal with the seven clips. |
|
11. INSTALL FRONT
LUGGAGE UNDER COVERS |

